Using OneClickSender with MetaMask: a step-by-step guide
From wallet connection to final signature — every screen you'll see, with the checks to run at each step.
OneClickSender makes it easy to send tokens to hundreds of wallets in a single transaction — and you can do it directly from your MetaMask wallet in just a few minutes.
If you're new to batch token distribution, this guide walks you through every step, from connecting your wallet to sending your first airdrop.
Why use MetaMask with OneClickSender?
MetaMask is one of the most trusted and widely used Ethereum wallets.
By integrating it with OneClickSender, you get:
- Familiar wallet interface
- Full control over approvals and transactions
- Direct access to any supported EVM network (Ethereum, BNB Chain, Polygon, and more)
Step-by-step tutorial
1. Visit the OneClickSender app
Go to app.oneclicksender.com.
Click "Connect Wallet" in the top right corner.
Tip: Make sure MetaMask is installed in your browser and you're logged in.
2. Connect MetaMask
A MetaMask pop-up will appear asking you to choose an account and approve the connection.
Select your desired wallet and click Next, then Connect.
You are now connected — you'll see your wallet address displayed in the app.
3. Select your network and token
From the dropdown menus:
- Choose the network (Ethereum, BNB Chain, Polygon, etc.)
- Choose the token you want to send (any ERC-20 compatible token)
Gas saving tip: For large airdrops, consider Polygon or BNB Chain for significantly lower fees.
4. Prepare and upload your CSV
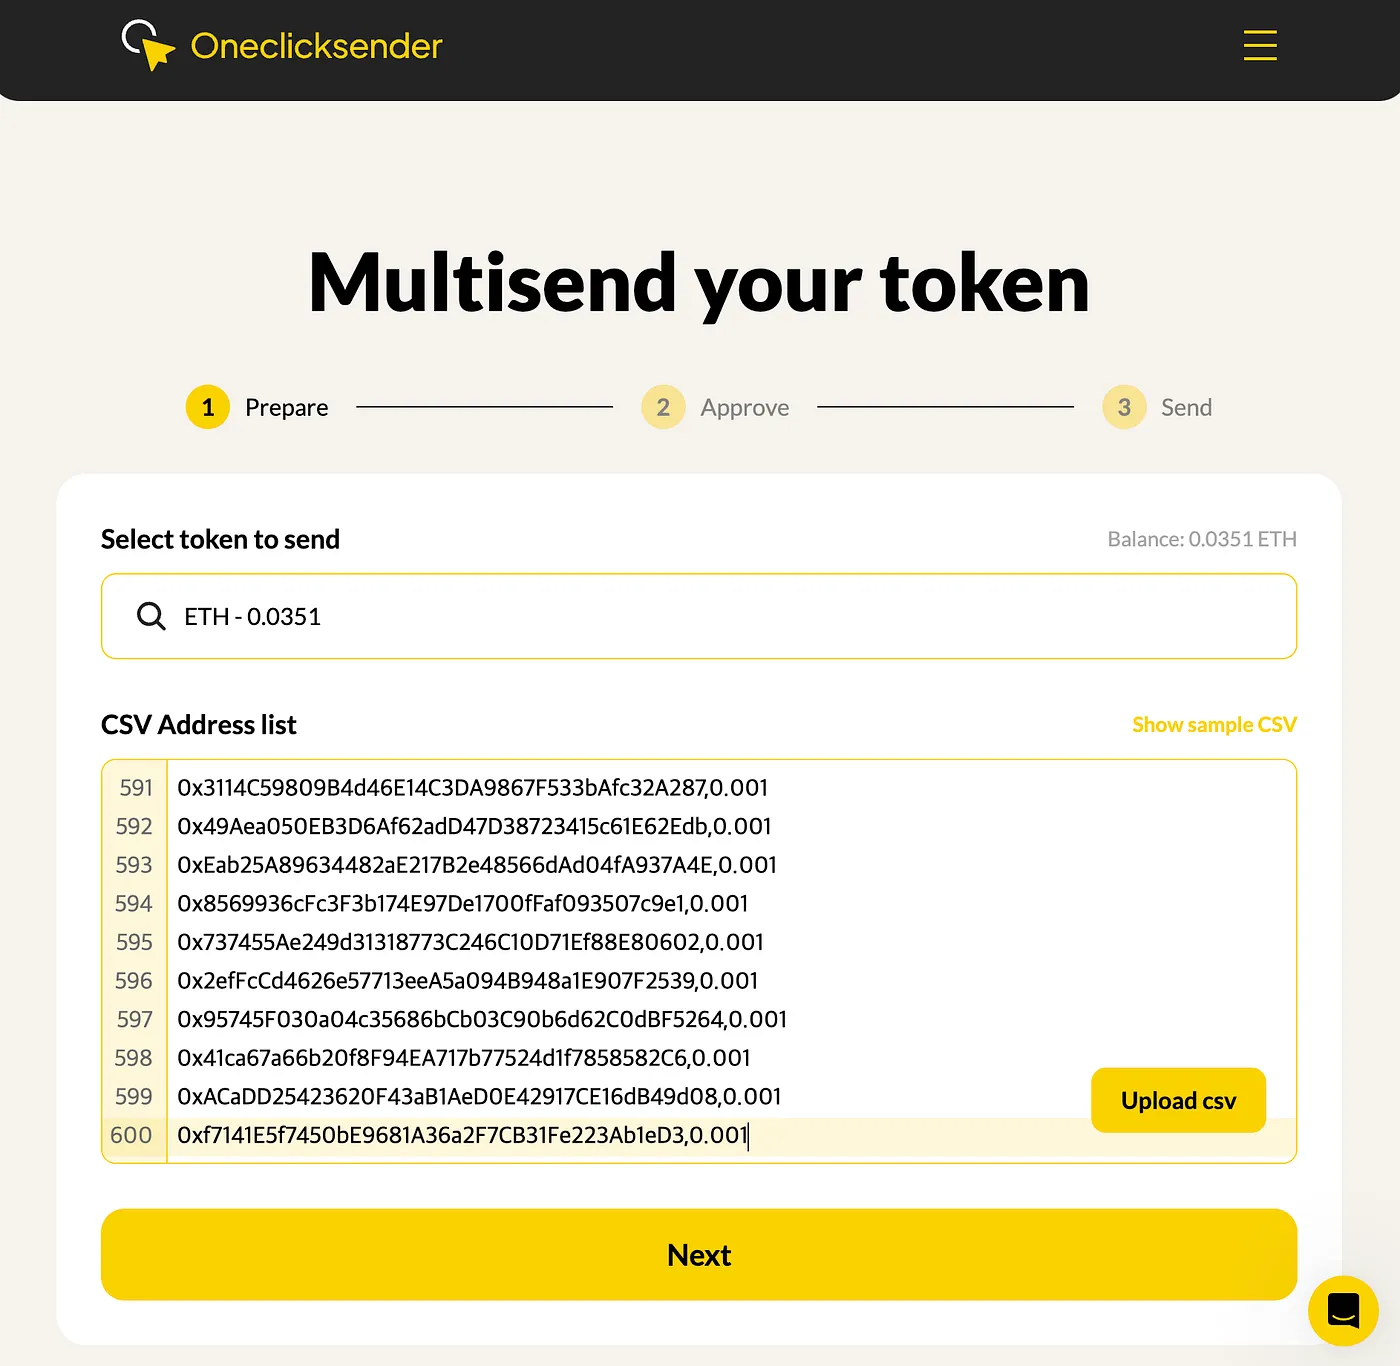
Create a .csv file with two columns:
0x1234abcd...,100
0x5678efgh...,50
Upload the file in the Upload CSV section.
The app will parse your list and show a preview of all recipients and amounts.
5. Approve and validate
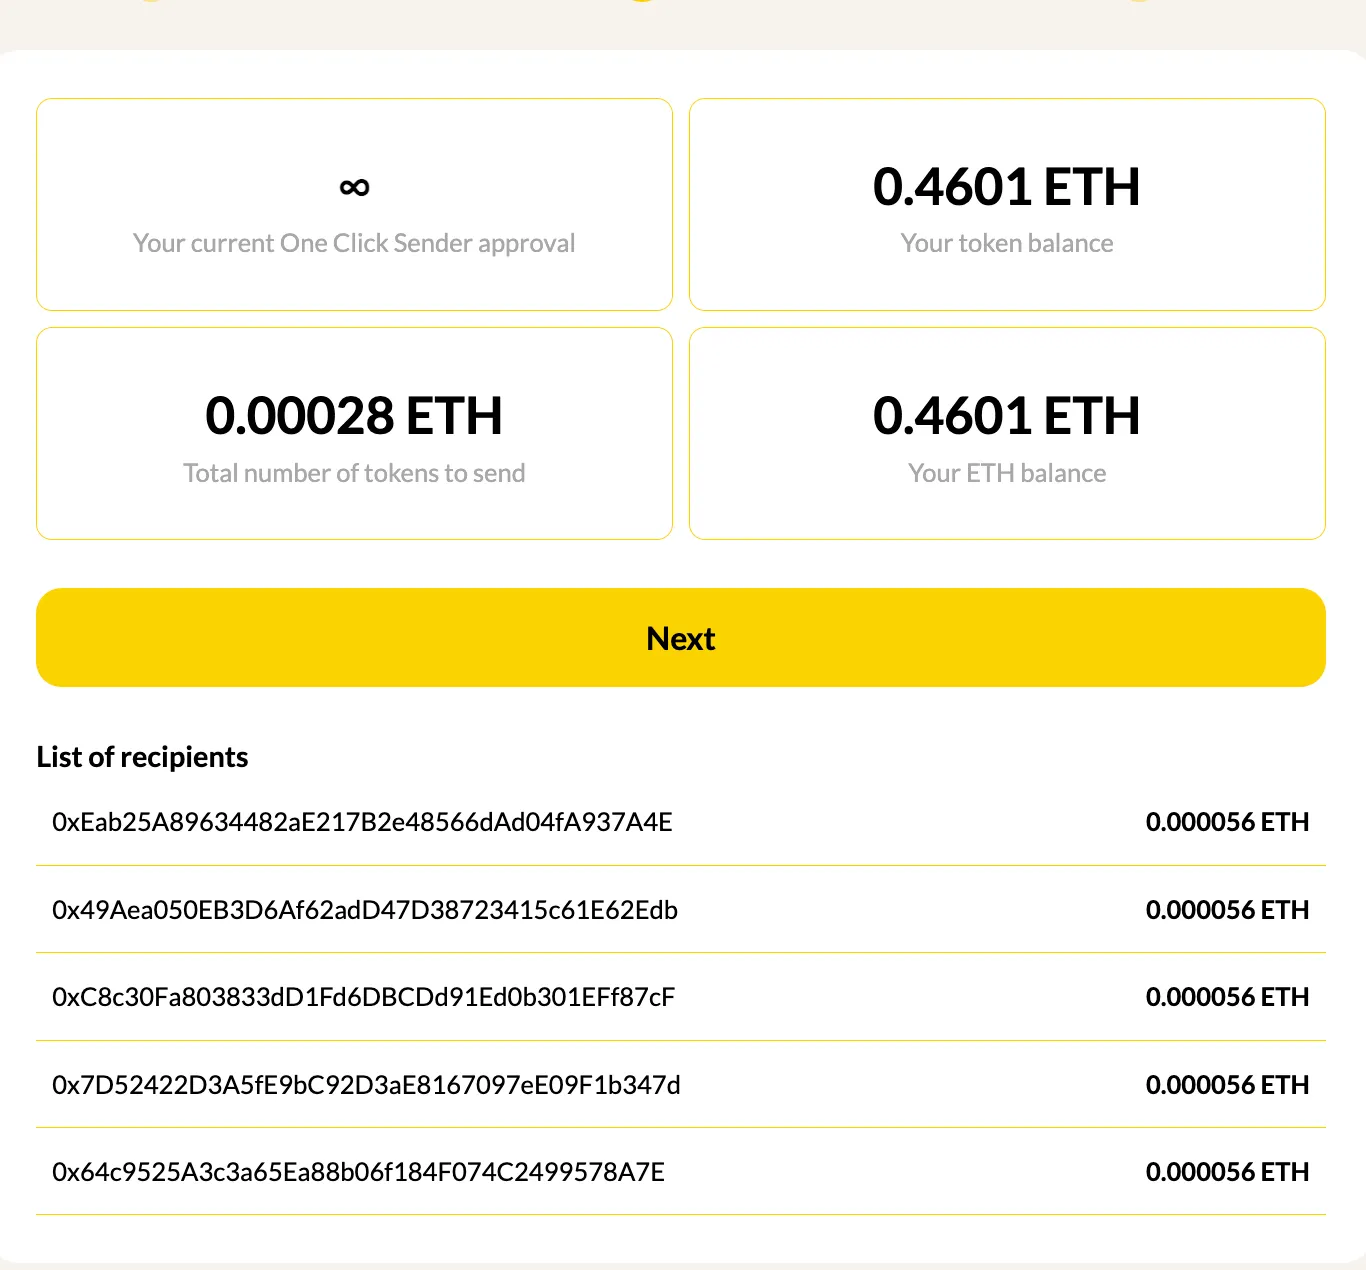
Before sending, you need to approve the token for the OneClickSender smart contract.
Click Approve Token and confirm the approval in MetaMask.
In this step, carefully check:
- The recipient list displayed in the app
- The total amount to be sent
- That your wallet balance is sufficient to cover the total amount
- That you've selected the correct token and network
Only proceed when everything looks correct.
6. Review fees and send
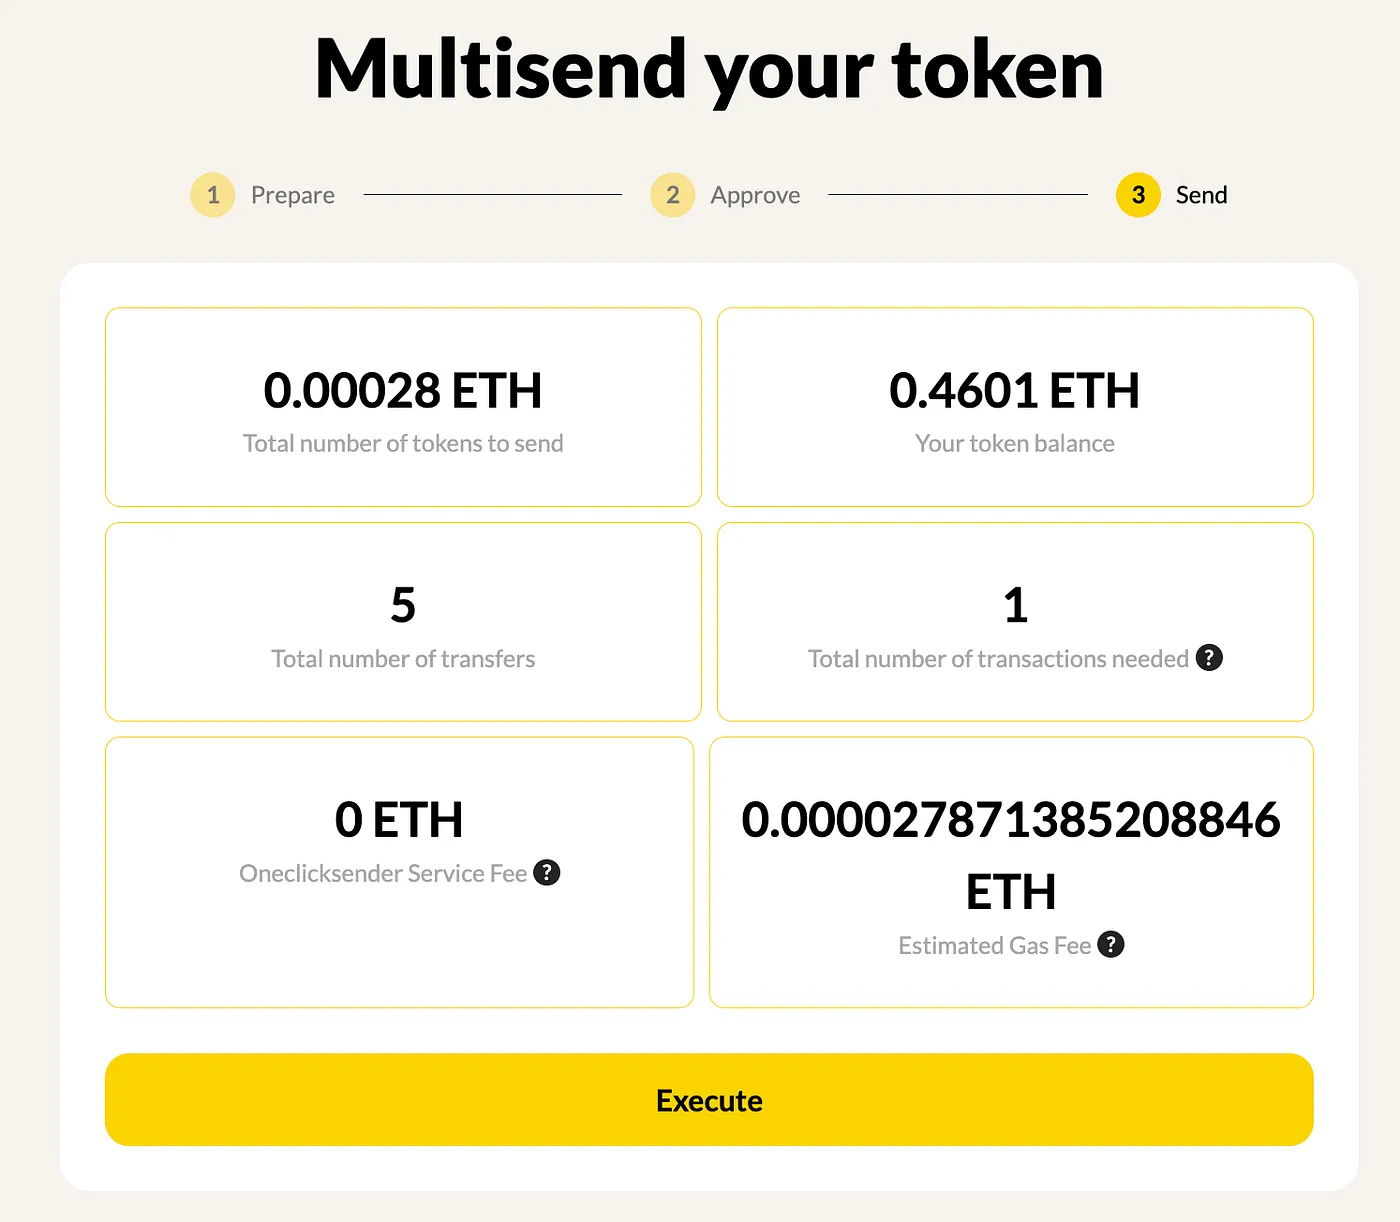
After validation, the app will show you:
- Service fee (e.g. 0.01 ETH per 600 recipients on Ethereum)
- Estimated gas fee for your chosen network
Confirm these costs in MetaMask, then click Send Tokens.
MetaMask will pop up again for final confirmation — approve it, and your batch transaction is broadcast.
Transparent pricing: OneClickSender's service fees are designed to be a small fraction of legacy tools.
Security and trust
- Audited smart contracts: OneClickSender's contracts have been formally audited.
- MetaMask integration: You keep full control over your private keys.
- Transparent operations: Everything runs on-chain, nothing stored off-chain.
Final thoughts
That's it — in just a few steps, you've sent tokens to hundreds of addresses using your existing MetaMask wallet.
No more manual transfers. No more wasted gas.
Start your first batch send now and see how OneClickSender makes large-scale token distribution simple, secure, and cost-effective.
Send your first batch.
Free for ten recipients or fewer — forever. Flat fees beyond that.